API Provider Setup
To authenticate a Marketo element instance you must first belong to the LaunchPoint Technology Partner Program. Once you have a Developer Sandbox, complete the setup steps described in this section.
To set up the API provider:
- Via a web browser, log in to your Marketo account at https://login.marketo.com/ .
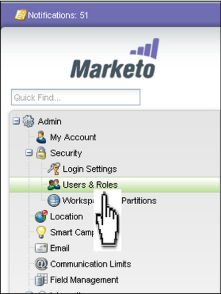
- Navigate to the admin area of the Marketo application.
- Click Users & Roles in the left panel.
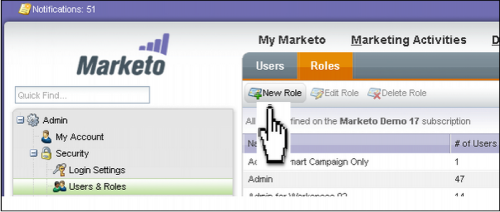
- Click New Role.
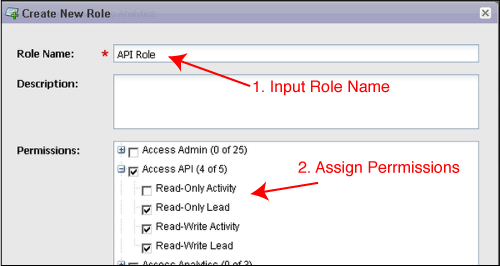
- Enter the Role Name and assign permissions.
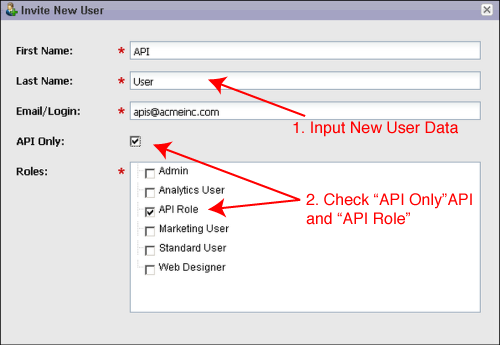
- The next step is to create an API only user and associating it with the API role that you created in the previous step. Select the API-Only check box and assign the API Role at the time of user creation.
- A Custom LaunchPoint service is required to uniquely identify your client application. To create a custom service, go to the Admin->LaunchPoint screen and select New Service from the New menu item.
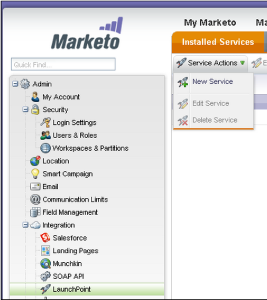
- Choose Custom service type, provide the display name, description and the user created earlier.
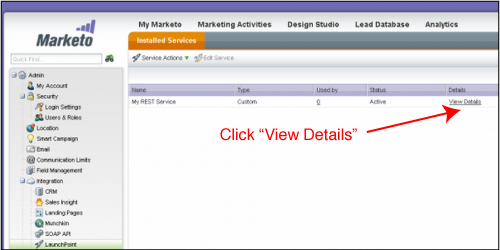
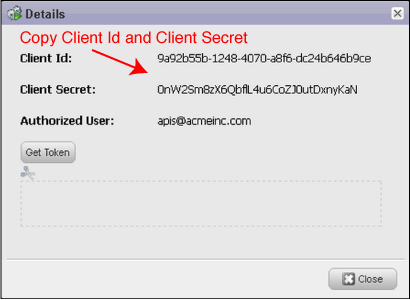
- Click the View Details link on the grid to get the Client Id and Client Secret.
Click the Web Services menu item and record the two URLs in the REST API section (Endpoint & Identity).

From here, you should have everything you need to authenticate an Element Instance of Marketo:
- Client Id
- Client Secret
- Endpoint (REST) URL
- Identity URL