BrightTALK
Create Instance
You can provision instances through Cloud Elements or through APIs. This section describes both methods and includes parameter details, a request sample, and a response sample.
Provision an Instance in Cloud Elements
Provision an Instance in Cloud Elements
Use Cloud Elements to provision an instance using our user interface. We provide a Provision Instance workflow that includes two steps: Provision it and Tag it.
- Sign in, and then search for the element in our Elements Catalog.
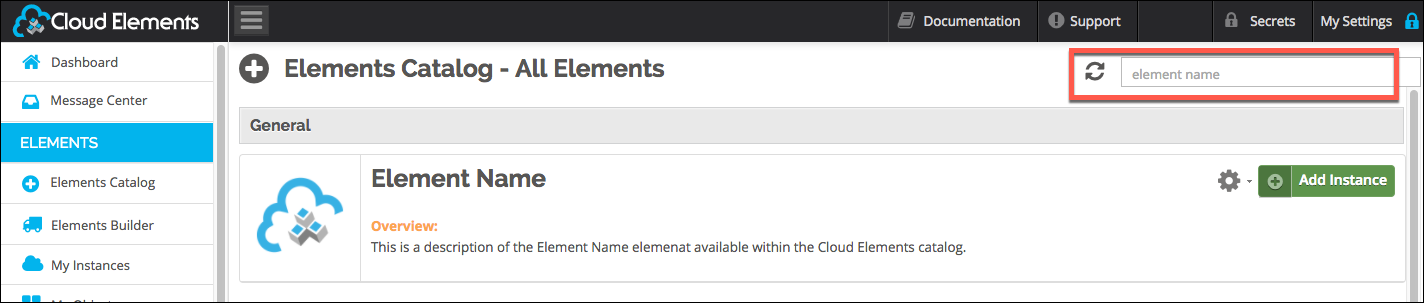
- Click Add Instance.
- Enter your Instance Name.
- Complete the Instance Configuration parameters. See Parameters or hover over the information icon for information about each parameter.
- Click Next.
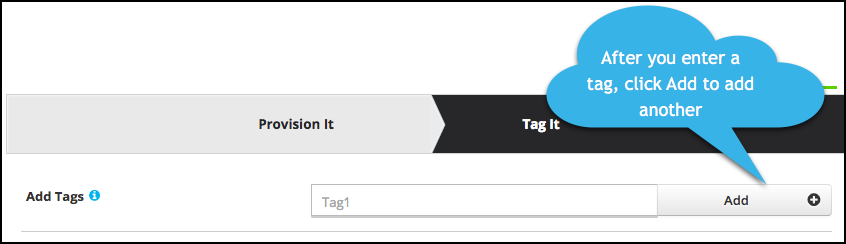
- On the Tag It page, enter any tags that might help further define the instance.
- To add more than one tag, click Add after each tag.
- To add more than one tag, click Add after each tag.
- Click Done.
- Take a look at the documentation for the element resources now available to you.

Provision an Instance via API
To provision your BrightTALK Element, use the /instances API.
Note: An Element token is returned upon successful execution of this API. Retain the token for all subsequent requests involving this element instance.
The provisioning API call includes:
- HTTP Headers: Authorization- User
, Organization - HTTP Verb: POST
- Request URL: /instances
- Request Body: Required – see below
- Query Parameters: none
Request Body
You must include an instance.json file with your instance request. See Parameters for information about each parameter. The Boolean parameters show default values.
Note: If you don't specify a required parameter, your response results in an error.
{
  "element": {
    "key": "brighttalk"
  },
  "configuration": {
    "brighttalk.api.key":  "<INSERT_BrightTALK_KEY>",
    "brighttalk.api.secret": "<INSERT_BrightTALK_SECRET>",
    "brighttalk.isstaging": false,
    "brighttalk.bulkignore.emailnotpresent": true,
    "filter.response.nulls": true
  },
  "tags": [
    "<INSERT_TAGS>"
  ],
  "name": "<INSERT_INSTANCE_NAME>"
}
Note: Make sure that you use straight quotes in your JSON files and cURL commands. Use plain text formatting in your code and ensure that you do not include spaces in the cURL command.
Parameters
The following table shows the parameters used to provision an instance. We noted optional parameters in the table, but if you do not specify values, the element will be provisioned with default values for the optional parameters.
| Parameter | Description | Data Type |
|---|---|---|
Instance Name name |
The name for the instance created during provisioning. | String |
API Key brighttalk.api.key |
The code that identifies the calling Element Instance to BrightTALK | String |
API Secret brighttalk.api.secret |
The secret associated with the API Key that identifies the calling Element Instance to BrightTALK | String |
Staging brighttalk.isstaging |
Optional. Indicates whether the instance should connect to a production or staging environment. No or false indicates production. Default: false |
Boolean |
Bulk ignore if email not present brighttalk.bulkignore.emailnotpresent |
Optional. Specifies what to do with a record during bulk download if it is missing an email . Set to Yes or true to ignore the record during download.Default: true |
Boolean |
Filter null values from the response filter.response.nulls |
Optional. Determines if null values in the response JSON should be filtered from the response. Yes or true indicates that Cloud Elements will filter null values. Default: true |
Boolean |
| Tags | Optional. User-defined tags to further identify the instance. | object |
Sample Request
Below is an example cURL request:
curl -X POST -H "Content-Type: application/json" -H "Authorization: User rapG956KSQJ/lZo20kdg2uurkG+wYU836miX1uQQT4k=, Organization 976c3406ee321baf50acfe6cf5eac1ac" -H "Cache-Control: no-cache" -H "Postman-Token: 5b56f6d5-e58e-d53f-a757-671f7cab58fa" -d '{
  "element": {
    "key": "brighttalk"
  },
  "configuration": {
    "brighttalk.api.key": "xxxxxx",
    "brighttalk.api.secret": "xxxxxxxxxxxxxxxxxxxxxxx",
    "brighttalk.isstaging": false,
    "brighttalk.bulkignore.emailnotpresent": true,
    "filter.response.nulls": true
  },
  "tags": [
    "Docs"
  ],
  "name": "BrightTalkforDocs"
}
' "https://api.cloud-elements.com/elements/api-v2/instances"
Sample Response
Below is an abridged successful JSON response:
{
  "id": 411183,
  "name": "BrightTalkforDocs",
  "createdDate": "2017-03-14T19:20:16Z",
  "token": "xxxxxxxxxxxxxxxxxxxxxxx=",
  "element": {
    "id": 184,
    "name": "BrightTALK",
    "hookName": "BrightTALK",
    "key": "brighttalk",
    "description": "Add an BrightTALK Instance to connect your existing BrightTALK account to the Marketing Hub, allowing you to manage your channels, subscribers, activities, etc. You will need your BrightTALK account information to add an instance.",
    "image": "https://www.brighttalk.com/resources/images/logo_b.png?v=97373",
    "active": true,
    "deleted": false,
    "typeOauth": false,
    "trialAccount": false,
    "signupURL": "http://www.brighttalk.com",
    "defaultTransformations": []
  },
  "configuration": {
   "brighttalk.api.secret": "xxxxxxxxxxxxxxxxxxxxxxx",
   "filter.response.nulls": "true",
   "brighttalk.bulkignore.emailnotpresent": "true",
   "brighttalk.isstaging": "false",
   "brighttalk.api.key": "xxxxxxxxxxxxxxxxxxxxxxx"
 }
}