Events
Cloud Elements currently supports events via polling or webhooks depending on the endpoint.
- Polling is a mechanism where Cloud Elements executes the configured query every
nminutes and captures the changed information. - Webhooks are when the provider lets Cloud Elements know what information has changed. Note that additional endpoint setup may be required prior to creating your Element Instance.
If you would like to see more information on our Events framework, please see the Event Management Guide.
Polling
In order to enable polling, add these extra configurations to your instance JSON:
"event.notification.enabled": "true",
"event.notification.callback.url": "<INSERT_YOUR_APPS_CALLBACK_URL>",
"event.poller.configuration": "<SEE_BELOW>"
instance JSON with polling events enabled:
{
  "element": {
    "key": "zendesk"
  },
  "providerData": {
    "code": "Code on Return the URL"
  },
  "configuration": {
    "oauth.api.key": "<INSERT_ZENDESK_UNIQUE_IDENTIFIER>",
    "oauth.api.secret": "<INSERT_ZENDESK_CLIENT_SECRET>",
    "oauth.callback.url": "https://www.my_cool_app.com",
    "zendesk.subdomain": "<INSERT_ZENDESK_SUB_DOMAIN>",
    "event.notification.enabled": "true",
    "event.notification.callback.url": "<INSERT_YOUR_APPS_CALLBACK_URL>",
    "event.poller.configuration": {
      "users": {
        "url": "/hubs/helpdesk/users",
        "idField": "id",
        "pageSize": 100,
        "datesConfiguration": {
          "updatedDateField": "updated_at",
          "updatedDateFormat": "yyyy-MM-dd'T'HH:mm:ss'Z'",
          "createdDateField": "created_at",
          "createdDateFormat": "yyyy-MM-dd'T'HH:mm:ss'Z'"
        }
      }
    }
  },
  "tags": [
    "<INSERT_TAGS>"
  ],
  "name": "<INSERT_INSTANCE_NAME>"
}
Webhooks
After you create an instance with webhooks enabled, your app will receive event notifications from Zendesk based on our default settings
Customization is an option based on your specific needs. See customization instructions below.
Webhook JSON
{
  "element": {
    "key": "zendesk"
  },
  "providerData": {
    "code": "Code on Return the URL"
  },
  "configuration": {
    "oauth.api.key": "<INSERT_ZENDESK_UNIQUE_IDENTIFIER>",
    "oauth.api.secret": "<INSERT_ZENDESK_CLIENT_SECRET>",
    "oauth.callback.url": "https://www.my_cool_app.com",
    "zendesk.subdomain": "<INSERT_ZENDESK_SUB_DOMAIN>",
    "event.notification.enabled": "true",
    "event.notification.callback.url": "<INSERT_YOUR_APPS_CALLBACK_URL>"
  },
  "tags": [
    "<INSERT_TAGS>"
  ],
  "name": "<INSERT_INSTANCE_NAME>"
}
NOTE: To begin all changes to tickets, your app will be notified.
You have the option to limit that scope according to your needs.
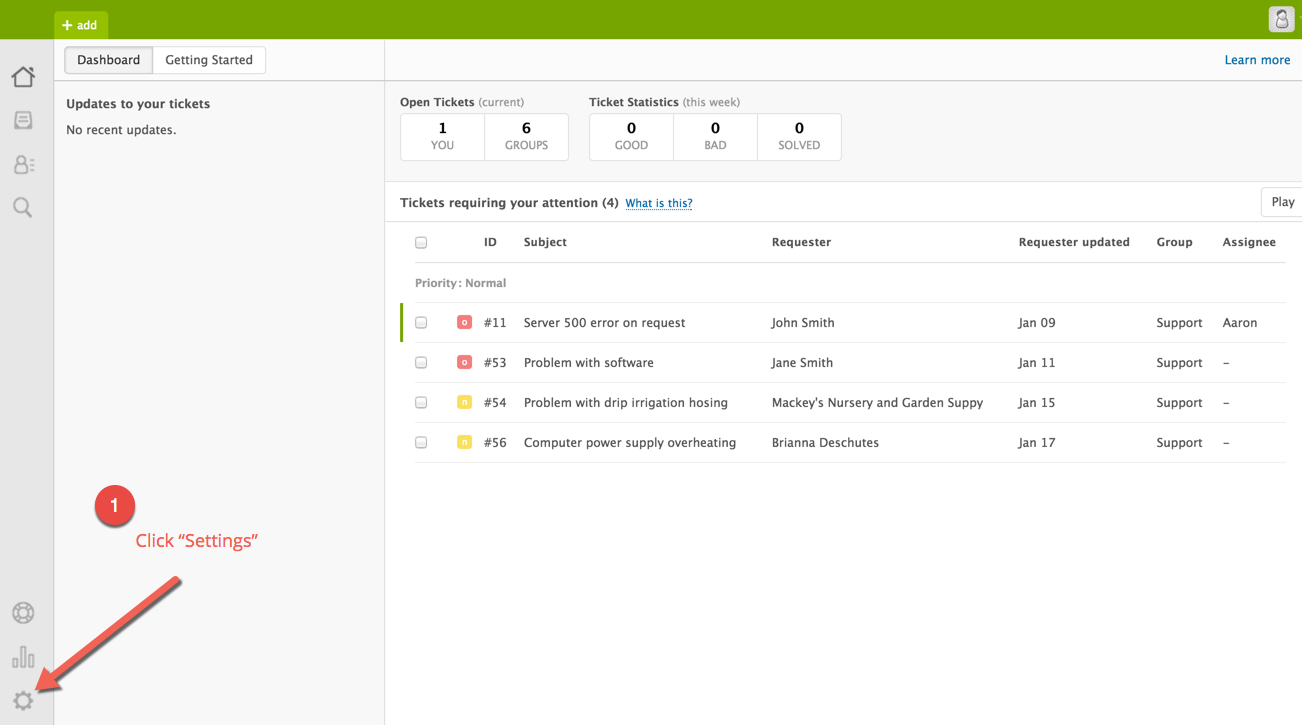
Login to your Zendesk account and click “Settings”
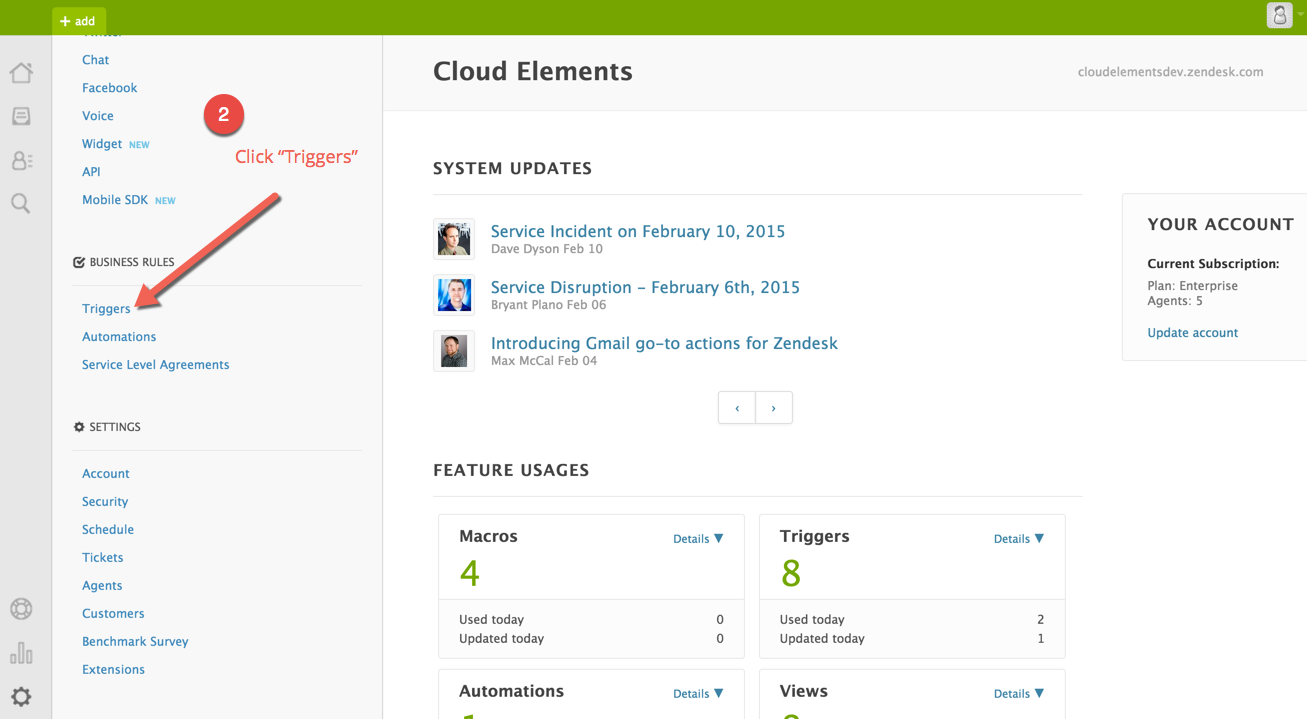
Scroll and find “Triggers” and click to select
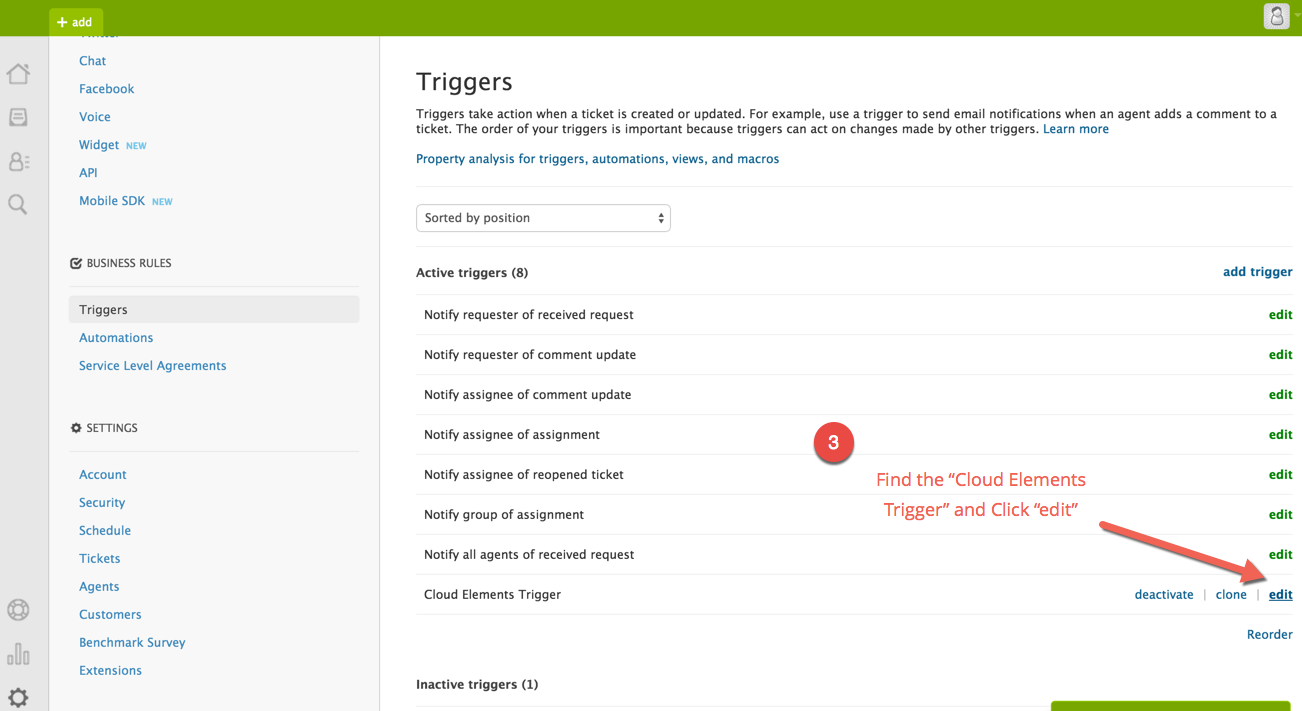
Find the Cloud Elements Trigger and click “edit”
NOTE: the following steps are OPTIONAL. Can Change the name of the Trigger
Can Change the Conditions of the Trigger
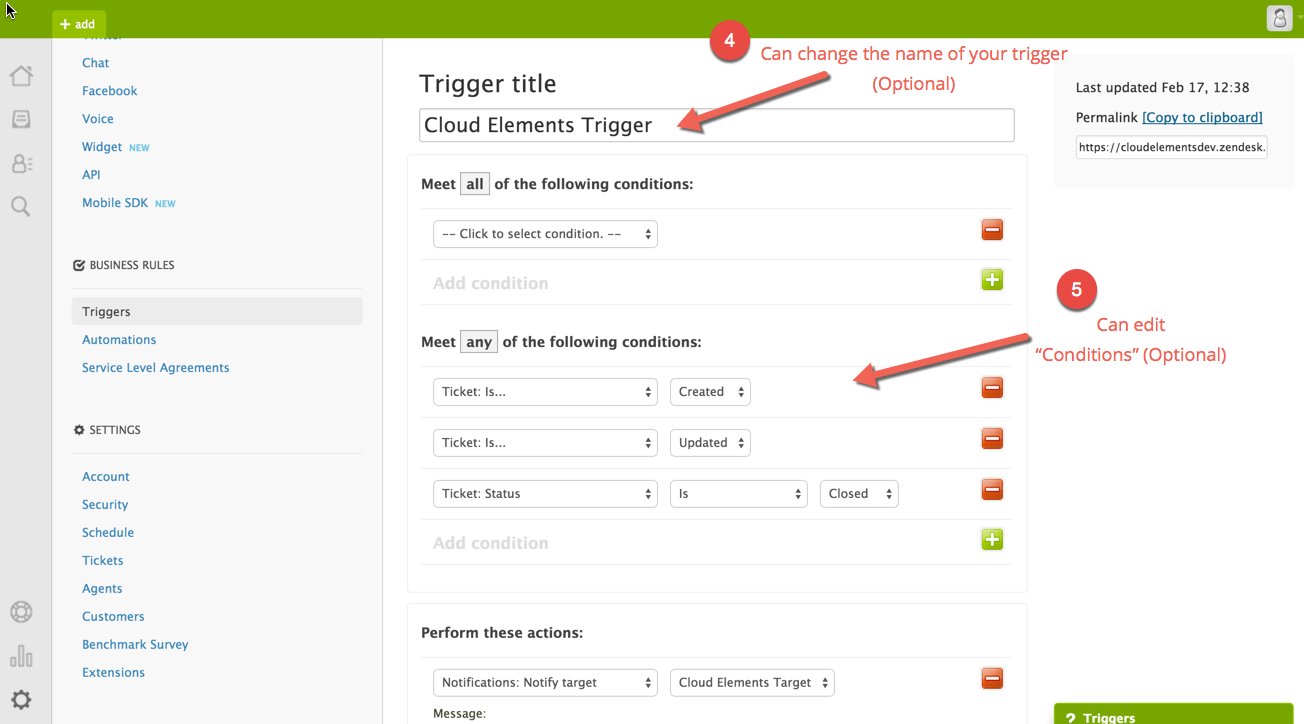
IMPORTANT: Please do not remove the target field, events will not function if removed.
Events rely on the target remaining the same and Message field conforming to a JSON friendly format.
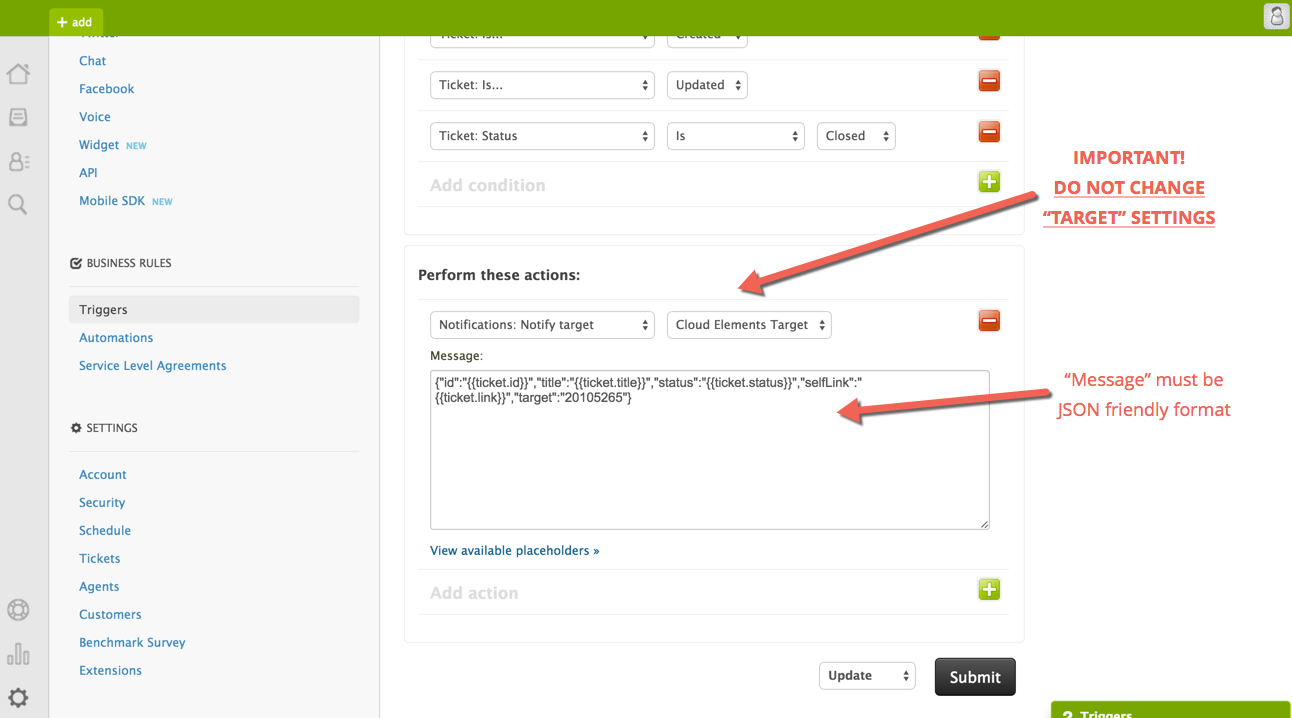
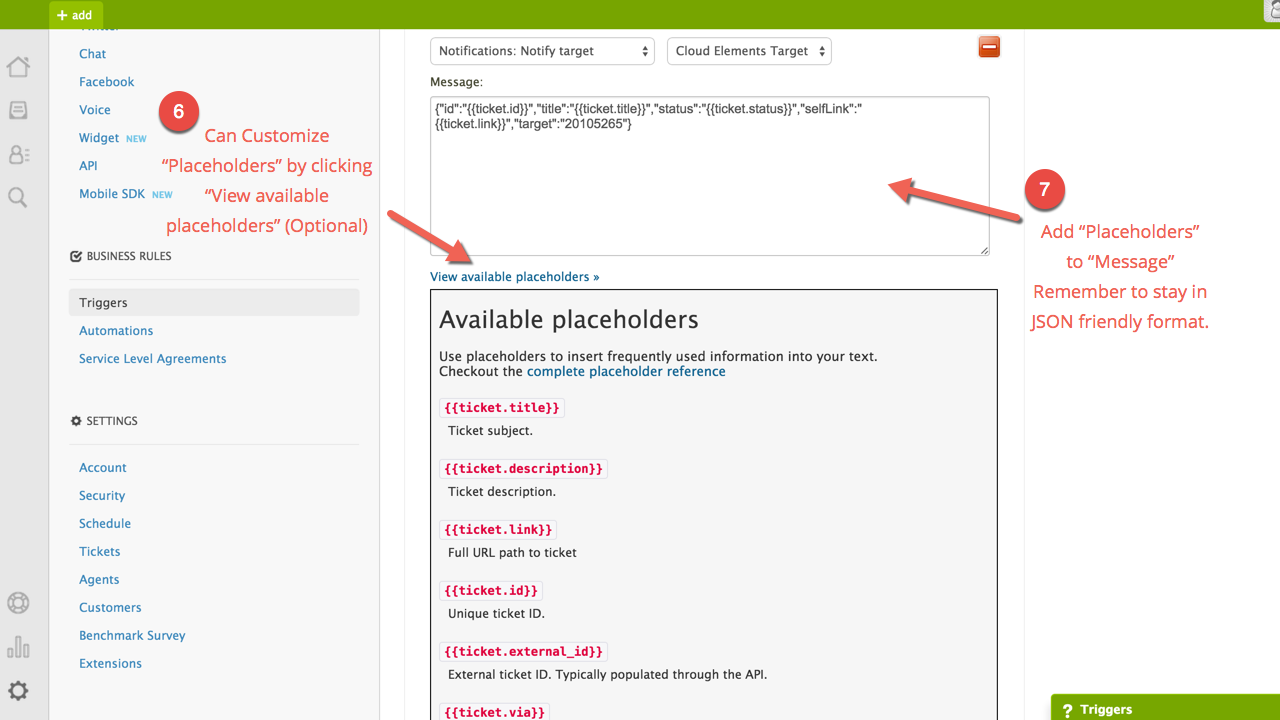
Feel free to add any of the Zendesk placeholders in your Message body, just remember to keep it JSON friendly.
Click on the View available placeholders
Add “Placeholders” to “Message” – Remember to keep in JSON friendly format.
