Sage Live
Endpoint Setup
Follow these steps to setup your Sage Live application with the endpoint.
In order to create a Sage Live Element Instance you must have the Enterprise edition or Professional edition with API support is required. Also, to set up a new application in Sage Live, you must have Administrator privileges. Please contact your system administrator if you do not have those privileges.
Via a web browser, login to your Sage Live account: https://login.salesforce.com/
Select "Setup" if not taken there by default:
In left hand nav menu, under create, select "Apps"
Click "New"

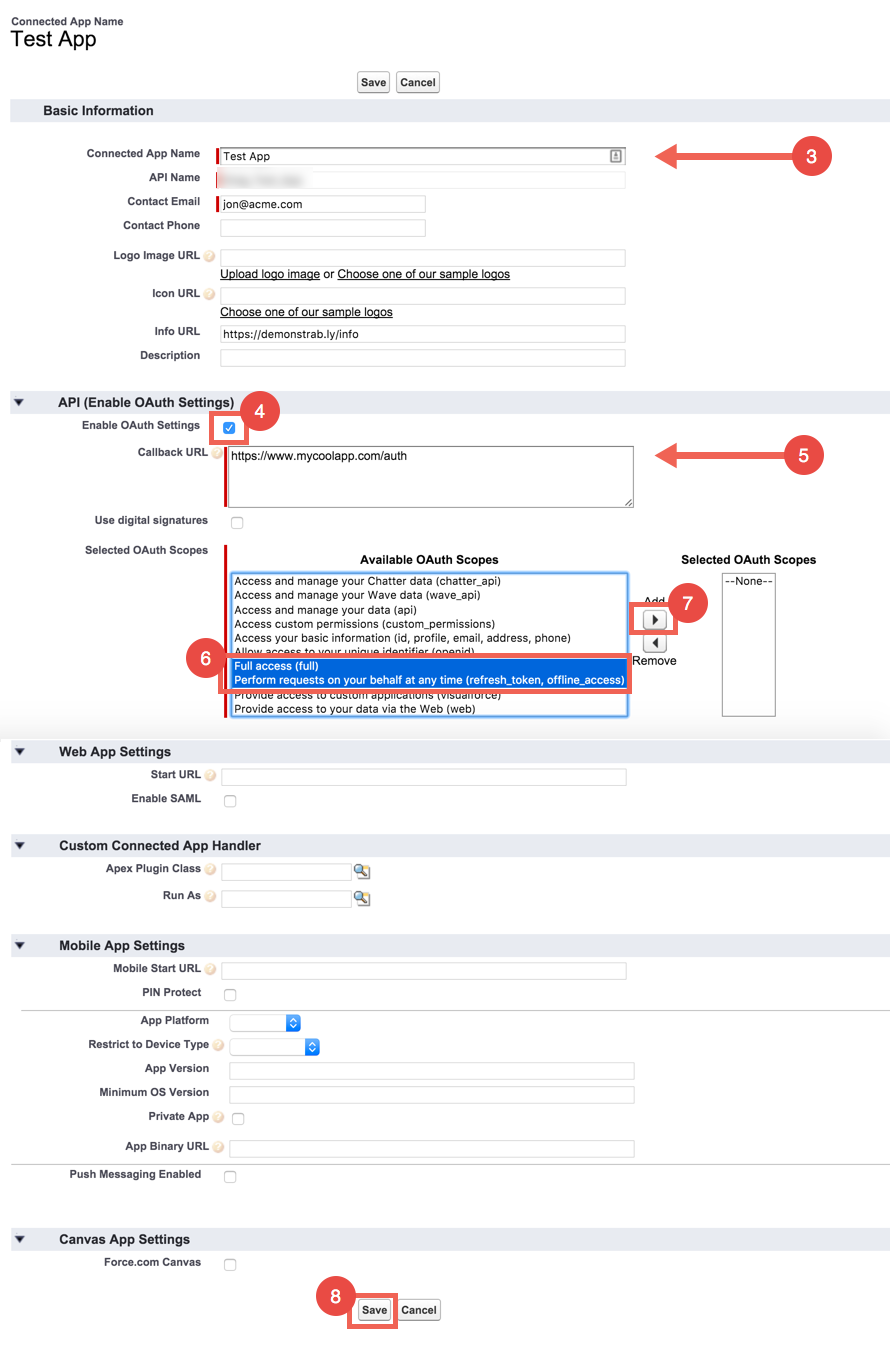
Fill out the basic information about the app
Make sure to select "Enable OAuth Settings"
You’ll be required to enter a callback URL from the endpoint. This URL will be in your application’s address space, and you will be required to retrieve some information returned on this URL by the endpoint. For our example, we’ll use a callback URL of
https://mycoolapp.com/authChoose from the "Selected OAuth Scopes". "Full Access" and "Perform requests on your behalf at any time (refreshtoken, offline_access)" are the minimum needed scopes.
Add the selected scopes
Click "Save" at the bottom of the window

Please make a note of the "Consumer Key"
Please make a note of the "Consumer Secret"

Next create an instance.