Events
Cloud Elements supports events via polling or webhooks depending on the API provider. If you would like to see more information on our Events framework, please see the Event Management Guide.
Supported Events and Resources
Cloud Elements supports polling events for Clover. After receiving an event, Cloud Elements standardizes the payload and sends an event to the configured callback URL of your authenticated element instance.
You can set up events for the following resources:
- timesheets
- employees
- payments
- roles
created, updated, and deleted data through our API. Copy the configuration of one of the default resources, and replace the name with the resource that you want to poll. Polling
You can configure polling through the UI or in the JSON body of the /instances API request .
Configure Polling Through the UI
For more information about each field described here, see Parameters.
To authenticate an element instance with polling:
- Enter the basic information required to authenticate an element instance as described in Authenticate with Clover .
- Enable events: Switch Events Enabled on.

- Add an Event Notification Callback URL.
- Use the Event poller refresh interval (mins) slider or enter a number in minutes to specify how often Cloud Elements should poll for changes.
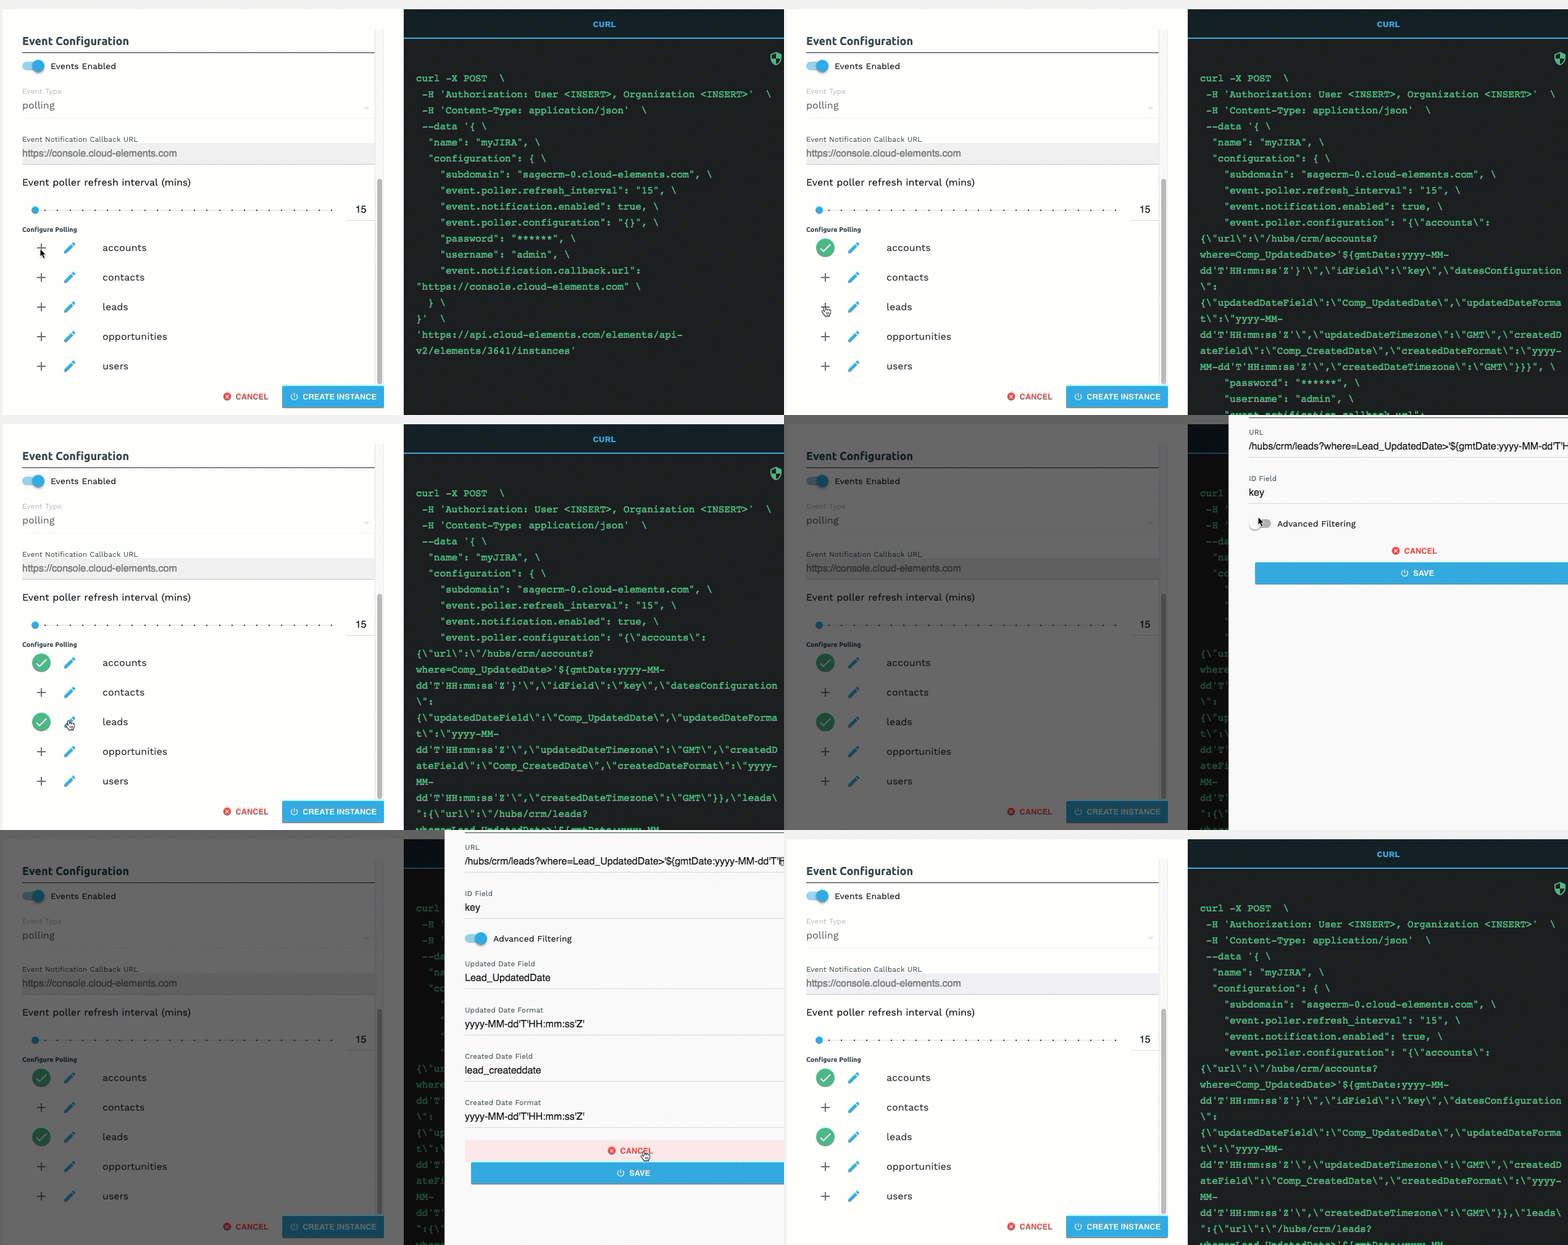
- Select the resources to poll.
- Advanced users can further configure polling:
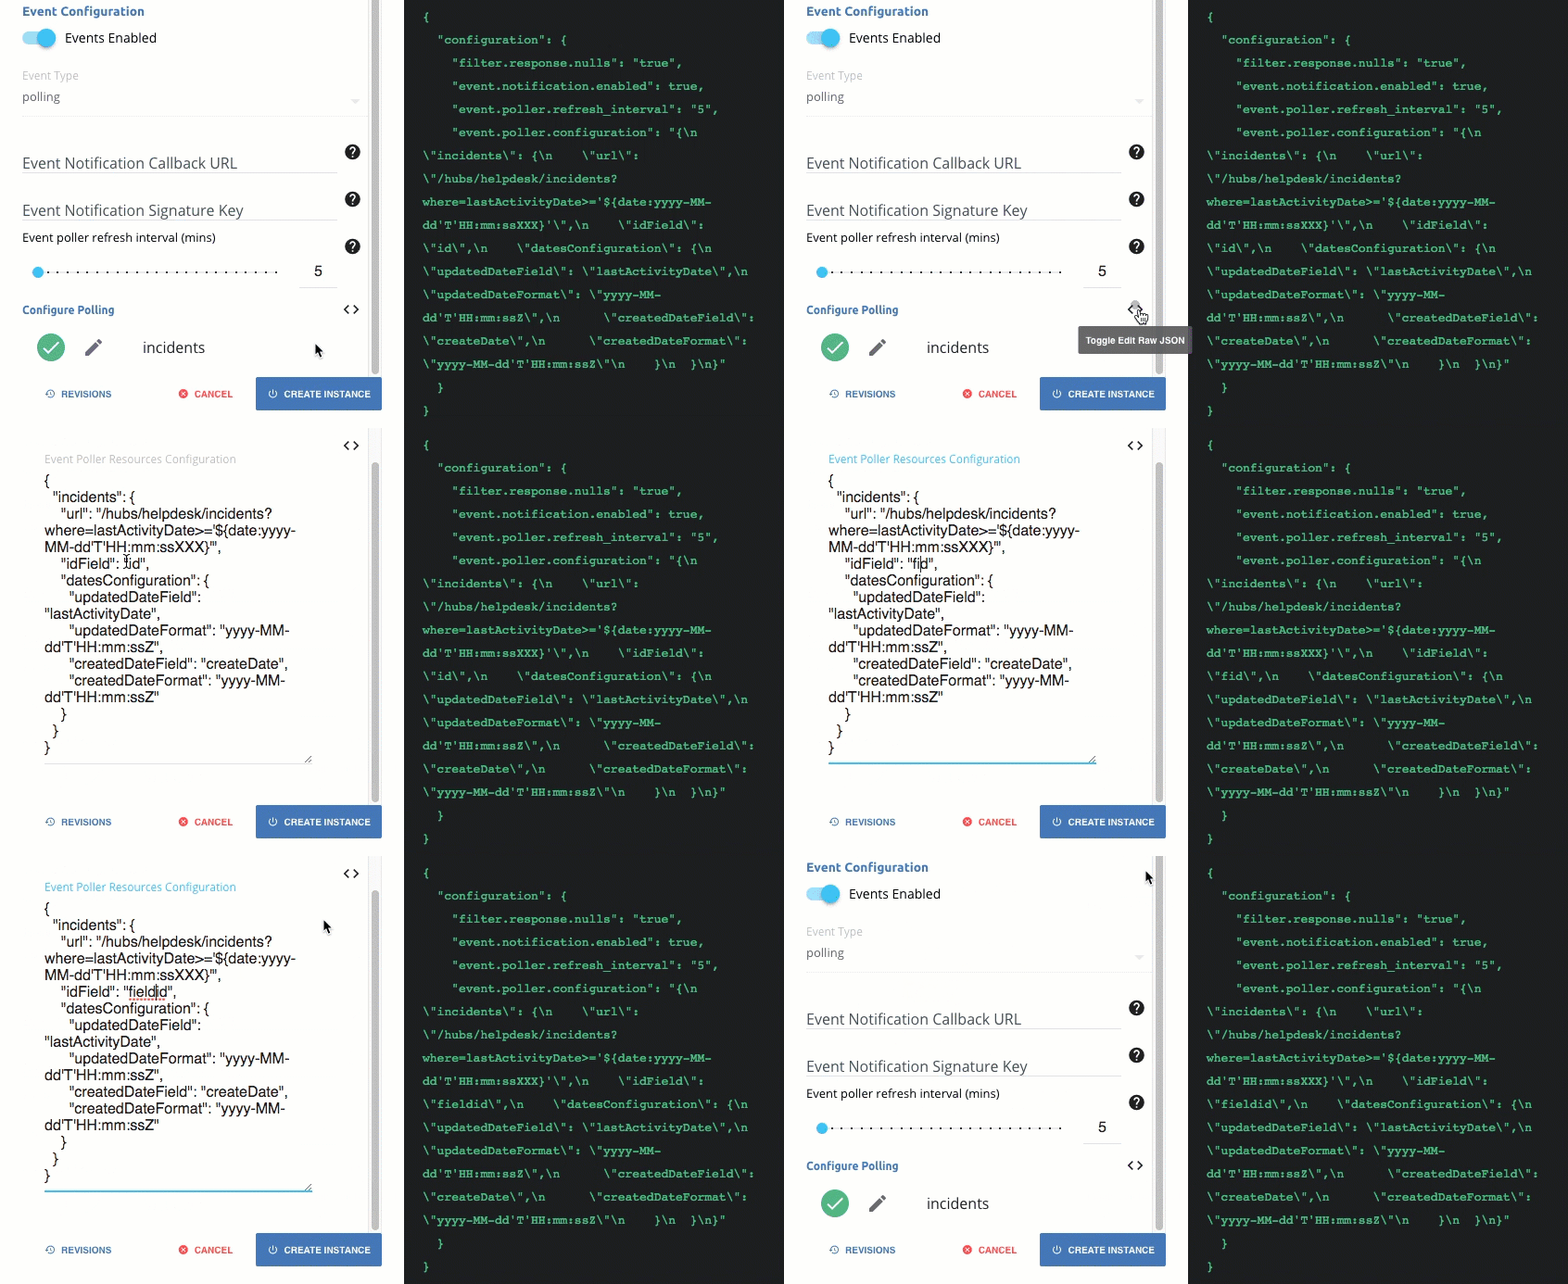
- Click
 to edit the polling configuration JSON directly.

- Click
 to access the poller configuration.

- Click
- Optionally type or select one or more Element Instance Tags to add to the authenticated element instance.
- Click Create Instance.
- Log in to Clover, and then allow the connection.
After successfully authenticating, we give you several options for next steps. Make requests using the API docs associated with the instance, map the instance to a virtual data resource, or use it in a formula template.
Configure Polling Through API
Use the /instances endpoint to authenticate with Clover and create an element instance with polling enabled.
To authenticate an element instance with polling:
- Get an authorization grant code by completing the steps in Getting a redirect URL and Authenticating users and receiving the authorization grant code.
Construct a JSON body as shown below (see Parameters):
{
  "element":{
    "key":"clover"
  },
  "providerData":{
    "code": "<AUTHORIZATION_GRANT_CODE>"
  },
  "configuration":{
    "oauth.api.key": "<Clover app Key Name>",
    "oauth.api.secret": "<Clover app Secret Name>",
    "oauth.callback.url": "<Clover app Callback URL Name >",
    "clover.sandbox": "<true or false>",
    "merchantId": "<Clover app Merchant ID>",
    "event.notification.enabled": true,
    "event.notification.callback.url": "http://mycoolapp.com",
    "event.poller.refresh_interval": "<minutes>",
    "event.poller.configuration":{
    "timesheets": {
      "url": "/hubs/employee/timesheets?where=out_and_override_time >'${date:yyyy-MM-dd'T'HH:mm:ssXXX}'",
      "idField": "id"
    },
    "employees": {
      "url": "/hubs/employee/employees?where=modifiedTime>'${gmtDate:yyyy-MM-dd'T'HH:mm:ssXXX}'",
      "idField": "id"
    },
    "payments": {
      "url": "/hubs/employee/payments?where=modifiedTime>'${gmtDate:yyyy-MM-dd'T'HH:mm:ssXXX}'",
      "idField": "id"
    },
    "roles": {
      "url": "/hubs/employee/roles?where=modifiedTime>'${gmtDate:yyyy-MM-dd'T'HH:mm:ssXXX}'",
      "idField": "id"
    }
  }
  },
  "tags":[
    "<Add_Your_Tag>"
  ],
  "name":"<INSTANCE_NAME>"
}
Call the following, including the JSON body you constructed in the previous step:
POST /instancesNote: Make sure that you include the User and Organization keys in the header. See the Overview for details.Locate the
tokenandidin the response and save them for all future requests using the element instance.
Example cURL with Polling
curl -X POST \
https://api.cloud-elements.com/elements/api-v2/instances \
-H 'authorization: User <USER_SECRET>, Organization <ORGANIZATION_SECRET>' \
-H 'content-type: application/json' \
-d '{
"element": {
  "key": "clover"
},
"providerData":{
  "code": "<AUTHORIZATION_GRANT_CODE>"
},
"configuration": {
  "oauth.callback.url": "https;//mycoolapp.com",
  "oauth.api.key": "Rand0MAP1-key",
  "oauth.api.secret": "fak3AP1-s3Cr3t",
  "clover.sandbox": "false",
  "merchantId": "5HBxxxxxxxxxxxx",
  "event.poller.configuration":{
        "timesheets": {
          "url": "/hubs/employee/timesheets?where=out_and_override_time >'${date:yyyy-MM-dd'T'HH:mm:ssXXX}'",
          "idField": "id"
        },
        "employees": {
          "url": "/hubs/employee/employees?where=modifiedTime>'${gmtDate:yyyy-MM-dd'T'HH:mm:ssXXX}'",
          "idField": "id"
        },
        "payments": {
          "url": "/hubs/employee/payments?where=modifiedTime>'${gmtDate:yyyy-MM-dd'T'HH:mm:ssXXX}'",
          "idField": "id"
        },
        "roles": {
          "url": "/hubs/employee/roles?where=modifiedTime>'${gmtDate:yyyy-MM-dd'T'HH:mm:ssXXX}'",
          "idField": "id"
        }
      }
    }
  },
  "tags": [
    "Docs"
  ],
  "name": "API Instance with Polling"
}'
Parameters
API parameters not shown in Cloud Elements are in code formatting.
| Parameter | Description | Data Type |
|---|---|---|
key |
The element key. clover |
string |
code |
The authorization grant code returned from the API provider in an OAuth 2.0 authentication workflow. Cloud Elements uses the code to retrieve the OAuth access and refresh tokens from the endpoint. | string |
Namename |
The name of the element instance created during authentication. | string |
OAuth API Keyoauth.api.key |
The API key or client ID obtained from registering your app with the provider. This is the Key Name that you noted in API Provider Setup. | string |
OAuth API Secretoauth.api.secret |
The client secret obtained from registering your app with the API provider. This is the Secret Name that you noted in API Provider Setup. | string |
OAuth Callback URLoauth.callback.url |
The API key or client ID obtained from registering your app with the provider. This is the Callback URL Name that you noted in API Provider Setup. | string |
Sandboxclover.sandbox |
For connecting to an app on a Clover Sandbox server select True. Otherwise keep the default False. |
boolean |
Merchant ID merchantId |
The Merchant ID that you recorded in API Provider Setup. | string |
Events Enabled event.notification.enabled |
Optional. Identifies that events are enabled for the element instance.Default: false. |
boolean |
Event Notification Callback URLevent.notification.callback.url |
The URL where you want Cloud Elements to send the events. | string |
Event poller refresh interval (mins)event.poller.refresh_interval |
A number in minutes to identify how often the poller should check for changes. | number |
Configure Pollingevent.poller.configuration |
Optional. Configuration parameters for polling. | JSON object |
| Resource to Poll | The polling event configuration of the resource that you will monitor. | JSON object |
URLurl |
The url to query for updates to the resource. | String |
ID FieldidField |
The field in the resource that is used to uniquely identify it. | String |
Advanced FilteringdatesConfiguration |
Configuration parameters for dates in polling | JSON Object |
Updated Date FieldupdatedDateField |
The field that identifies an updated object. | String |
Updated Date FormatupdatedDateFormat |
The date format of the field that identifies an updated object. | String |
Created Date FieldcreatedDateField |
The field that identifies a created object. | String |
Created Date FormatcreatedDateFormat |
The date format of the field that identifies a created object. | String |
| tags | Optional. User-defined tags to further identify the instance. | string |